
Before turning on any stovetop heat, combine the 1 cup of cornstarch, 1 cup of baking soda, and ¾ cup of water directly inside your saucepan. Whisk vigorously for 60 seconds until the powders are completely hydrated into a smooth, cold, lump-free liquid slurry. Resolving lumps at this stage ensures a perfectly smooth ceramic finish later.
2. Low-Heat Gelatinization
Place the saucepan over low heat and begin stirring continuously. Do not walk away from the stove; the mixture transitions from a fluid slurry to a dense gel rapidly once it reaches its thermal threshold. Stir constantly, scraping the bottom of the pan to prevent scorching. After 5 to 10 minutes, the paste will thicken abruptly, pulling away from the walls of the saucepan and clumping into a singular, cohesive ball. Remove from the heat immediately; overcooking drives off essential moisture, leaving the dough dry and crumbly.
3. The Humidity-Controlled Cool Down
Scrape the hot dough out of the pan and onto a sheet of parchment paper. The dough will be too hot to handle immediately. Cover the warm mass loosely with a clean, damp kitchen towel and let it rest for 10 to 15 minutes. The damp towel is essential to prevent the outer surface from drying out and forming a hard, unworkable skin.
4. Pigment Integration
Divide the warm, pliable dough into separate portions for coloring. Drop a very small amount of food coloring onto each portion. Knead the dough thoroughly between your palms until the pigment is perfectly distributed and uniform.
Coloring Tip: Keep the color saturation light and pastel-toned. Heavily saturated dyes block light transmission, reducing the signature translucent glass effect. For a marbled look, fold two contrasting colors together just twice to create elegant swirls without blending them completely.
5. Laminated Rolling Protocol
Place a colored dough ball directly between two sheets of parchment paper. Using long, smooth strokes with a rolling pin, flatten the dough to an even thickness of one-quarter of an inch. Rolling exclusively between parchment sheets prevents the sticky starch from tearing and ensures a flawless, polished surface on both sides of the sheet.
6. Cut and Perforate the Shapes
Press your cookie cutters firmly down through the rolled dough. Lift the cut hearts and flowers carefully, transferring them onto a fresh, flat sheet of parchment paper. Gather the remaining dough scraps, knead them briefly with a drop of water if needed to restore pliability, and re-roll to cut more shapes. Before the surface air-dries, press a straw straight down near the top edge of each shape, twisting slightly to cleanly punch a hanging hole.
7. The Crucial 48-Hour Drying and Evaporation Cycle
Leave the cut ornaments to air-dry completely in a dry, well-ventilated room. This process takes 24 to 48 hours depending on ambient humidity.
The Non-Negotiable Flip: After approximately 12 hours of drying, gently flip every single piece over. Because moisture evaporates only from the exposed top surface, the top layer contracts faster than the damp bottom layer, creating intense surface tension that causes the ornament to warp and curl. Flipping ensures symmetric evaporation and perfectly flat results.
8. Mechanical Sanding and Sealing
Once the pieces are fully dry, they will transition from pliable clay into a hard, ceramic-like state. If you notice any tiny rough edges left behind by the cookie cutters, use ultra-fine sandpaper (400-grit or higher) to gently buff them smooth. To protect the starch matrix from structural damage caused by atmospheric humidity, apply a thin, even coat of Mod Podge or a clear acrylic craft spray sealant across all surfaces. String with ribbon and hang in a sunlit window.
Creative Variations to Try
-
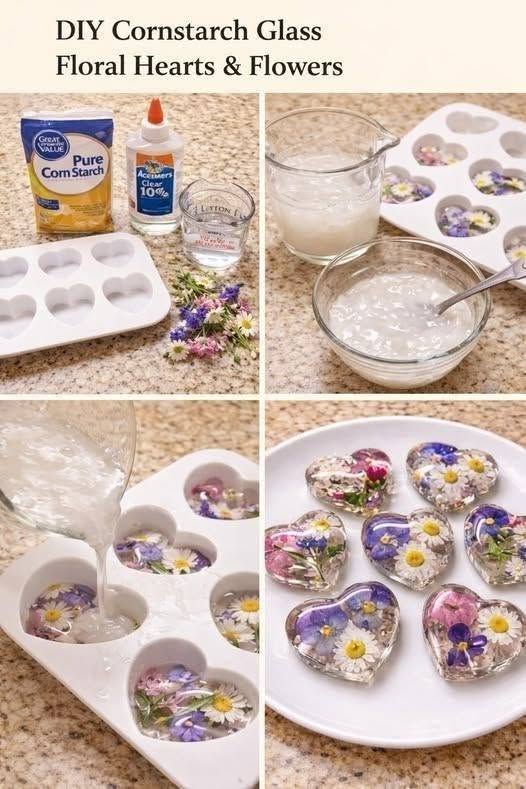
Pressed Botanical Inlays: Place a tiny, flat pressed dried flower or green leaf onto the surface of the freshly cut dough shape. Gently roll over it once with the rolling pin to embed the organic material flush into the starch matrix. As the dough dries, it locks the flower inside, making it beautifully visible through the translucent background.
-
Gilded Artisan Edges: Once the ornaments are completely dry and sealed, use a fine paintbrush to apply a thin border of metallic gold or silver leaf paint along the outer edges of the hearts and flowers to create a classic cloisonné or stained-glass lead look.
